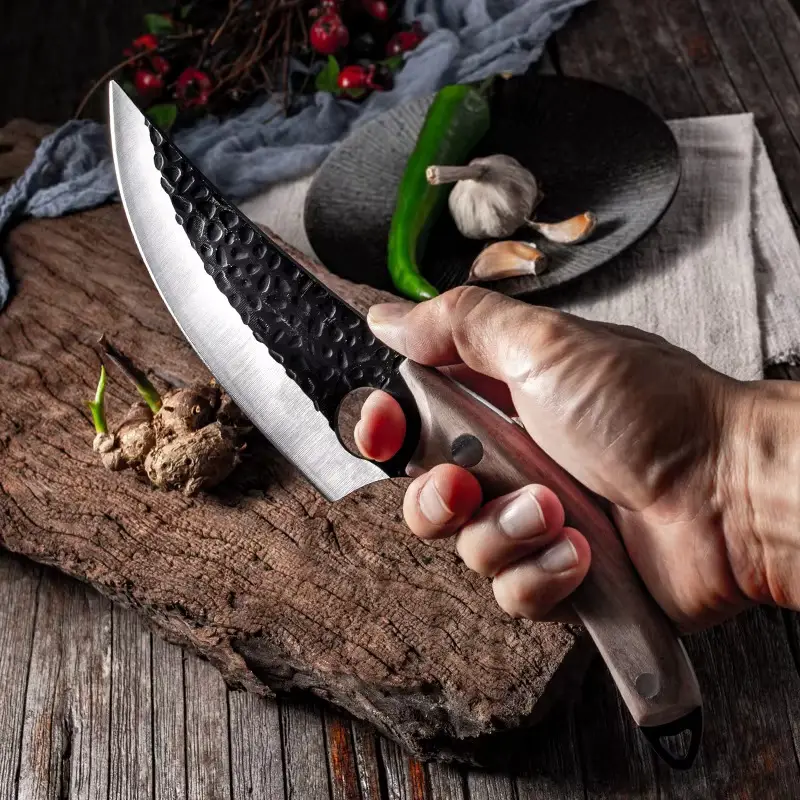
Discover the Kitchen Tool Everyone Is Raving About!
- • Precision Engineered: Sharp blade with durable craftsmanship.
- • Comfort First: Ergonomic design for effortless slicing.
- • Stylish & Strong: Elegant wood handle meets stainless steel strength.
- • Risk-Free Pick: Thousands of happy home chefs can’t be wrong.
- • Today’s Deal: Just $29.95 instead of $99.85 — limited-time offer!
This post may include affiliate links — learn more here .
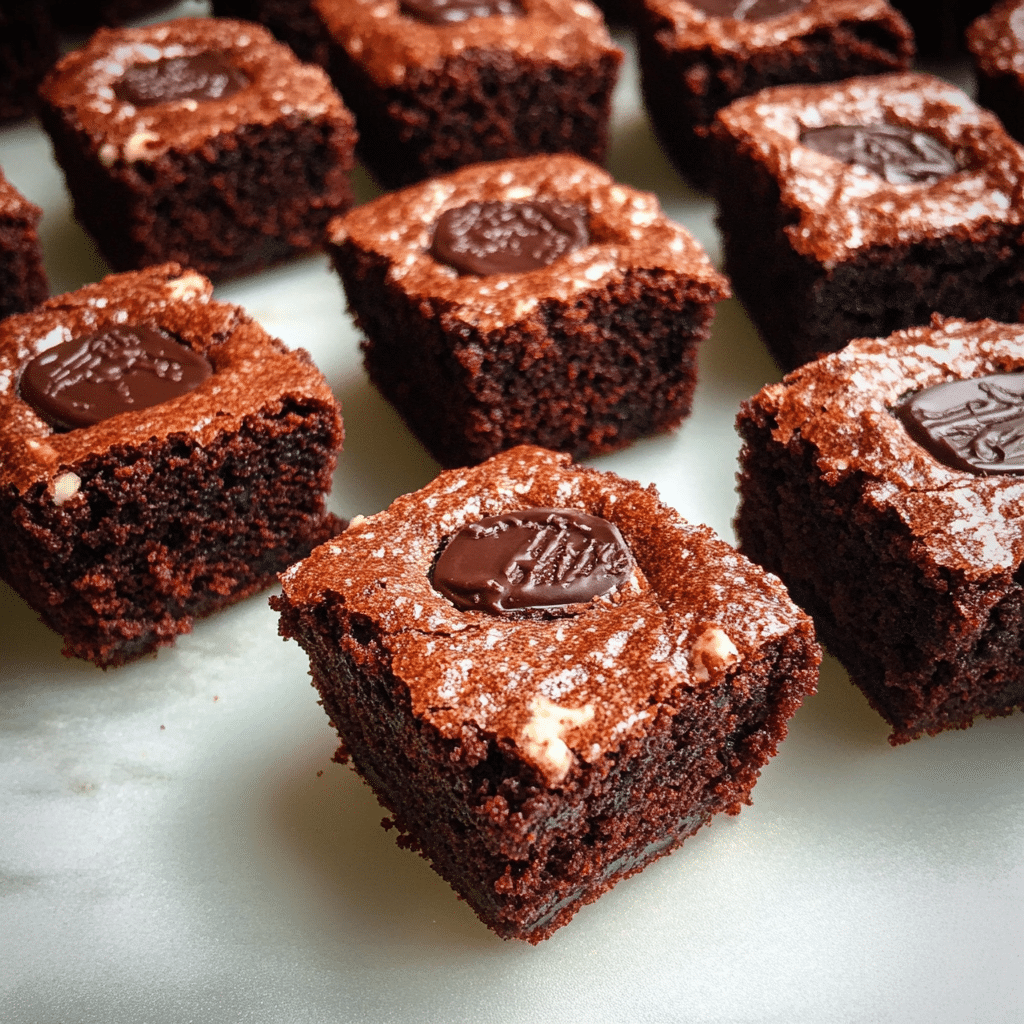
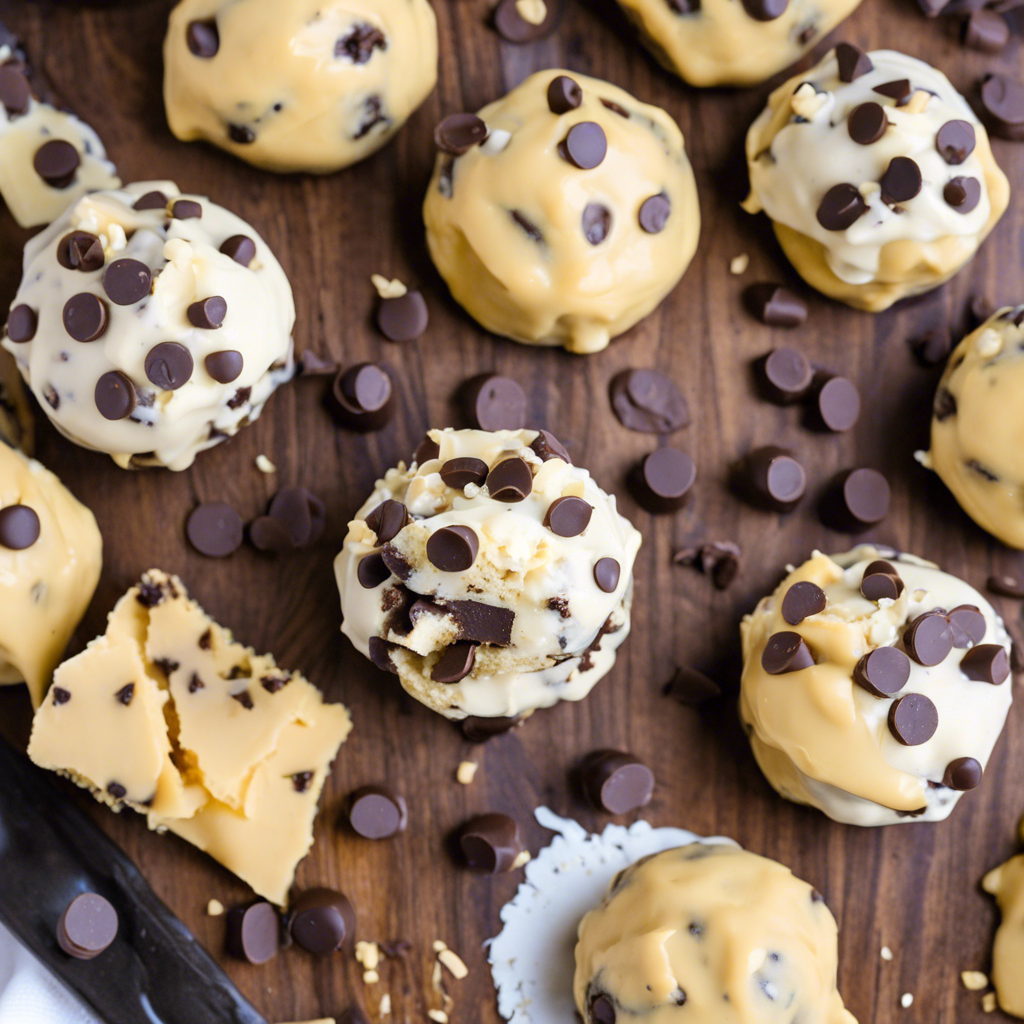
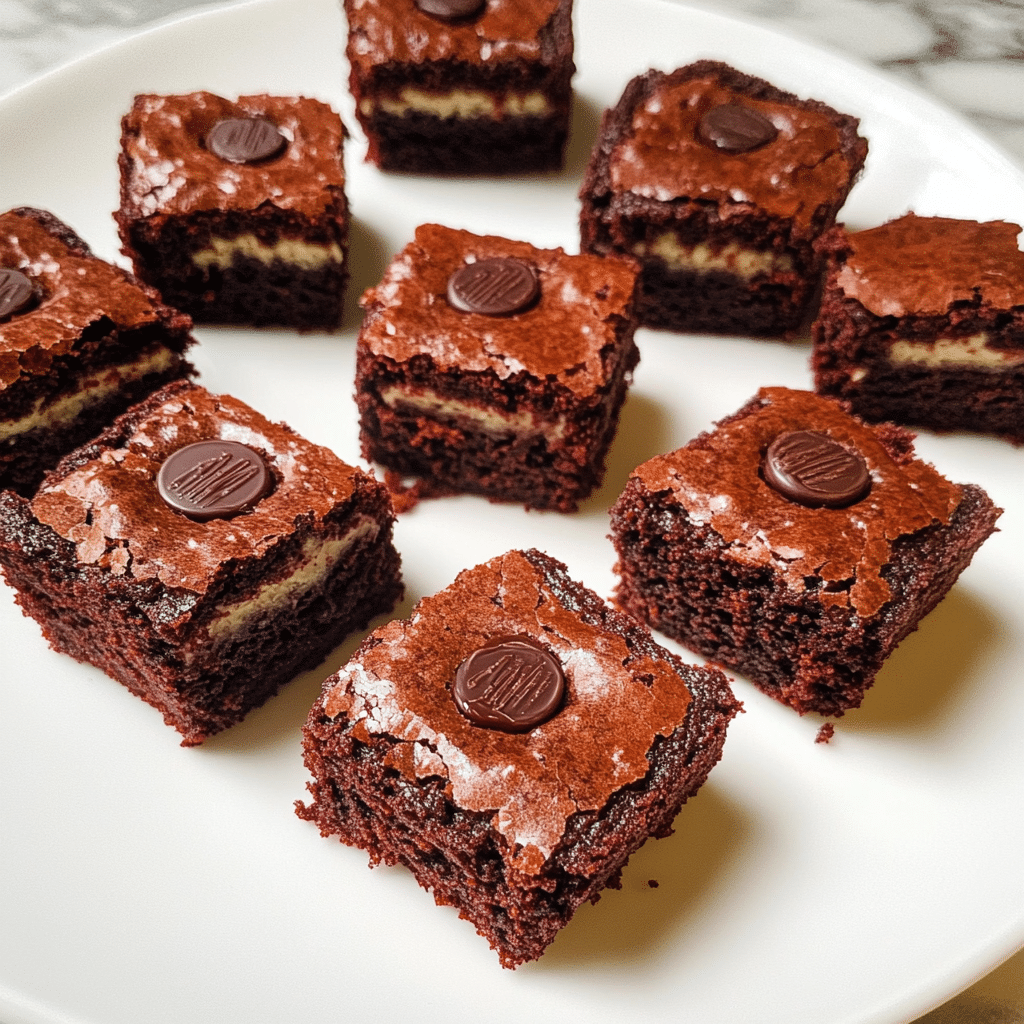
Mini Dark Chocolate Stuffed Red Velvet Brownies are bite-sized treats that combine the richness of red velvet brownies with the indulgent surprise of gooey dark chocolate inside. These mini brownies have a soft, fudgy texture and are baked in a muffin tin for perfectly portioned bites. The center is filled with a piece of dark chocolate that melts as the brownies bake, creating a luscious molten core in every bite.
I first made these for a Valentine’s Day party, and they were a showstopper! The vibrant red velvet contrasts beautifully with the dark chocolate, while the rich, creamy center takes these brownies to the next level. What I love most about this recipe is its versatility—you can add a sprinkle of powdered sugar, a drizzle of chocolate ganache, or even top them with a dollop of whipped cream for an elegant finish. Whether served as a dessert for a special occasion or as a decadent snack, Mini Dark Chocolate Stuffed Red Velvet Brownies are sure to impress!
Perfect for:
- Birthday parties
- Holiday gatherings
- Romantic dates
- Afternoon snacks
- Gifting to loved ones
Why You’ll Love This Recipe
Here are 10 reasons why Mini Dark Chocolate Stuffed Red Velvet Brownies will be your new go-to dessert:
- Perfect Size: Bite-sized portions make these brownies ideal for parties and portion control.
- Vibrant Red Velvet Base: Classic red velvet flavor with a hint of cocoa and a striking red hue.
- Decadent Filling: Dark chocolate centers add a rich, creamy surprise in every bite.
- Soft and Chewy Texture: Fudgy brownies that melt in your mouth.
- Eye-Catching Presentation: Their deep red color and glossy chocolate filling are visually stunning.
- Quick and Easy: Simple steps and minimal ingredients make this a hassle-free dessert.
- Customizable: Experiment with fillings like cream cheese or white chocolate for variety.
- Make-Ahead Friendly: Prepare them a day in advance for stress-free entertaining.
- Perfect Pairing: Enjoy with coffee, tea, or a glass of milk for the ultimate treat.
- Versatile Treat: Ideal for any celebration or as a comforting indulgence.
Preparation and Cooking Time
- Total Time: 1 hour
- Preparation Time: 15 minutes
- Cooking Time: 20 minutes
- Cooling Time: 25 minutes
- Servings: 12 mini brownies
- Calories per serving: Approximately 180-200 calories
- Key Nutrients: Protein: 2g, Carbs: 20g, Fat: 10g
Ingredients
For the Red Velvet Brownie Base:
- ½ cup all-purpose flour
- ¼ cup unsweetened cocoa powder
- ½ teaspoon baking powder
- ¼ teaspoon salt
- ½ cup unsalted butter, melted
- ¾ cup granulated sugar
- 1 large egg
- 1 teaspoon vanilla extract
- 1 tablespoon red food coloring
For the Dark Chocolate Filling:
- 6 oz dark chocolate, chopped
- ¼ cup heavy cream
Optional Garnish:
- Powdered sugar for dusting
- Chocolate shavings
Ingredient Highlights
- Dark Chocolate: Provides an intense, bittersweet flavor that pairs beautifully with the red velvet base.
- Unsweetened Cocoa Powder: Enhances the brownie’s deep cocoa undertones.
- Red Food Coloring: Creates the signature red velvet hue.
Step-by-Step Instructions


Prepare the Brownie Batter:
- Preheat Oven: Preheat your oven to 350°F (175°C). Grease and line a mini muffin tin with paper liners.
- Mix Dry Ingredients: In a small bowl, whisk together flour, cocoa powder, baking powder, and salt.
- Combine Wet Ingredients: In a large bowl, mix melted butter and sugar until smooth. Beat in the egg, vanilla extract, and red food coloring.
- Incorporate Dry Ingredients: Gradually add the dry ingredients to the wet mixture, stirring until just combined.
Prepare the Chocolate Filling:
- Melt Chocolate: In a microwave-safe bowl, heat the dark chocolate and heavy cream in 30-second intervals, stirring until smooth and glossy.
Assemble and Bake:
- Fill the Tin: Spoon a small amount of brownie batter into each mini muffin cup, filling about halfway.
- Add Filling: Drop a teaspoon of the chocolate filling into the center of each cup.
- Cover with Batter: Top with more brownie batter until the cups are ¾ full.
- Bake: Bake for 18-20 minutes, or until the edges are set and a toothpick inserted into the brownie (not the filling) comes out clean.
Cool and Serve:
- Cool in Pan: Allow the brownies to cool in the tin for 10 minutes, then transfer to a wire rack to cool completely.
- Garnish: Dust with powdered sugar or top with chocolate shavings before serving.
How to Serve
Here are 10 serving suggestions for Mini Dark Chocolate Stuffed Red Velvet Brownies:
- On Dessert Platters: Serve alongside cookies and truffles for a diverse dessert spread.
- With Ice Cream: Pair with a scoop of vanilla or coffee ice cream for extra indulgence.
- As Party Favors: Package in decorative boxes for a memorable takeaway treat.
- With Coffee or Tea: Enjoy as an afternoon pick-me-up.
- For Celebrations: Add festive sprinkles to match holiday or party themes.
- Drizzled with Sauce: Serve with caramel or raspberry sauce for added flavor.
- Layered in Trifles: Use as a base for mini dessert trifles.
- At Picnics: Easy to pack and share outdoors.
- As a Midnight Snack: Satisfy late-night sweet cravings.
- For Gifting: Present in a jar with a decorative ribbon for a thoughtful gift.
Additional Tips
- Don’t Overfill: Leave space in the muffin cups to prevent overflow during baking.
- Chill the Filling: Slightly cool the chocolate filling for easier assembly.
- Use a Scoop: A small cookie scoop ensures evenly portioned batter.
- Avoid Overmixing: Mix just until combined to keep the brownies tender.
- Test for Doneness: The edges should be set while the centers remain slightly soft.
Recipe Variations
- Cream Cheese Filling: Replace the dark chocolate filling with a sweetened cream cheese mixture.
- White Chocolate Drizzle: Finish with a drizzle of melted white chocolate for contrast.
- Peanut Butter Twist: Add a dollop of peanut butter to the chocolate filling.
- Gluten-Free Option: Substitute the all-purpose flour with almond or gluten-free flour.
- Festive Colors: Use green food coloring for a holiday-themed treat.
- Mint Chocolate: Add a drop of mint extract to the filling for a refreshing twist.
- Nutty Surprise: Mix in chopped pecans or walnuts for added texture.
- Double Chocolate: Stir chocolate chips into the batter for extra chocolatey goodness.
- Raspberry Infusion: Add a fresh raspberry atop the filling before covering with batter.
- Espresso Kick: Incorporate espresso powder into the batter for a mocha flavor.
Special Equipment
- Mini Muffin Tin: Essential for creating perfectly portioned brownies.
- Piping Bag: Optional for precise filling placement.
- Mixing Bowls: For separating wet and dry ingredients.
- Whisk and Spatula: For mixing and scraping down the bowl.
- Wire Rack: For cooling brownies evenly.
FAQ Section
- Can I use milk chocolate instead of dark chocolate?
Yes, but the filling will be sweeter and less intense in flavor. - How do I store these brownies?
Store in an airtight container at room temperature for up to 3 days or refrigerate for up to a week. - Can I freeze these brownies?
Absolutely! Freeze in an airtight container for up to 2 months. Thaw before serving. - What if I don’t have red food coloring?
You can skip it or use natural alternatives like beet juice. - How can I make them vegan?
Use dairy-free butter, plant-based cream, and an egg substitute like flax eggs. - Why is my batter too thick?
Ensure you measure flour correctly and don’t overmix; adding a splash of milk can help. - Can I double the recipe?
Yes, simply scale up the ingredients and use multiple muffin tins. - What if I don’t have a mini muffin tin?
Use a standard muffin tin and adjust the baking time slightly. - Can I add a topping before baking?
Yes, sprinkle coarse sugar or crushed nuts on top before baking for added texture. - How can I achieve a glossy filling?
Use high-quality chocolate and ensure the ganache is smooth before filling.
Conclusion
Mini Dark Chocolate Stuffed Red Velvet Brownies are bite-sized treats that combine the rich, velvety flavor of red velvet with the indulgence of gooey dark chocolate. These brownies are perfect for parties, holidays, or anytime you’re craving a decadent dessert in a small, shareable package. The contrast of the vibrant red exterior with the dark chocolate filling makes them as visually stunning as they are delicious.
To make these brownies, prepare a red velvet brownie batter using cocoa powder, buttermilk, and a hint of vanilla. Pour the batter into a mini muffin tin, filling each cavity halfway. Add a piece of dark chocolate or a dollop of chocolate ganache in the center, then top with more batter to seal the chocolate inside. Bake until the brownies are just set, allowing the dark chocolate to remain gooey and melty.
Once cooled, dust the brownies with powdered sugar, drizzle with white chocolate, or add a swirl of cream cheese frosting for extra flair. These mini brownies are rich, indulgent, and the perfect size for a sweet bite of decadence.
I can’t wait to see how your Mini Dark Chocolate Stuffed Red Velvet Brownies turn out! Be sure to share your photos on Instagram and tag me—I’d love to see your delicious creations. Don’t forget to leave a comment and let me know how you made this recipe your own!