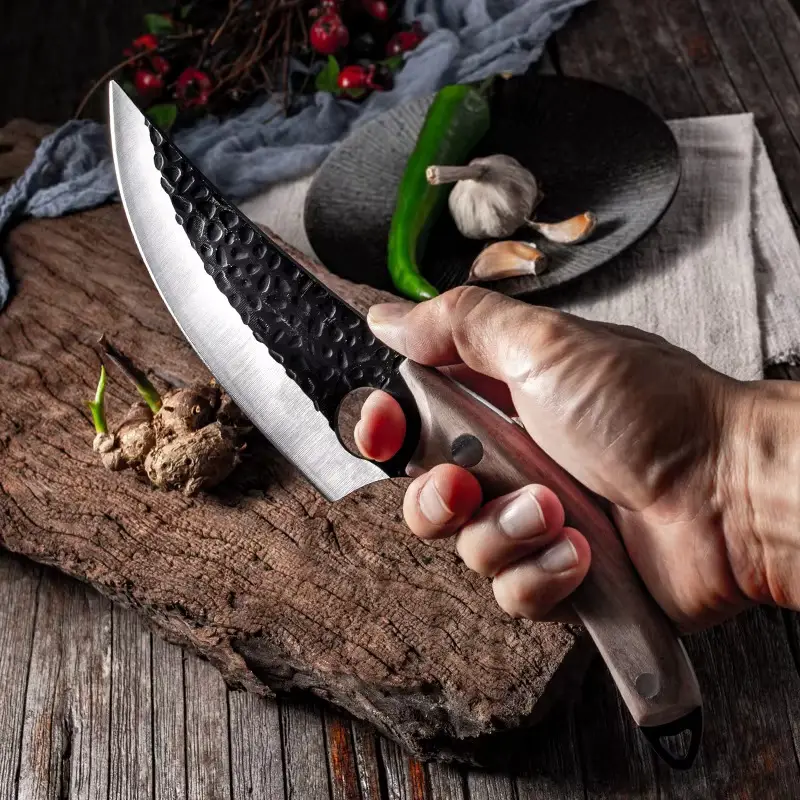
Discover the Kitchen Tool Everyone Is Raving About!
- • Precision Engineered: Sharp blade with durable craftsmanship.
- • Comfort First: Ergonomic design for effortless slicing.
- • Stylish & Strong: Elegant wood handle meets stainless steel strength.
- • Risk-Free Pick: Thousands of happy home chefs can’t be wrong.
- • Today’s Deal: Just $29.95 instead of $99.85 — limited-time offer!
This post may include affiliate links — learn more here .
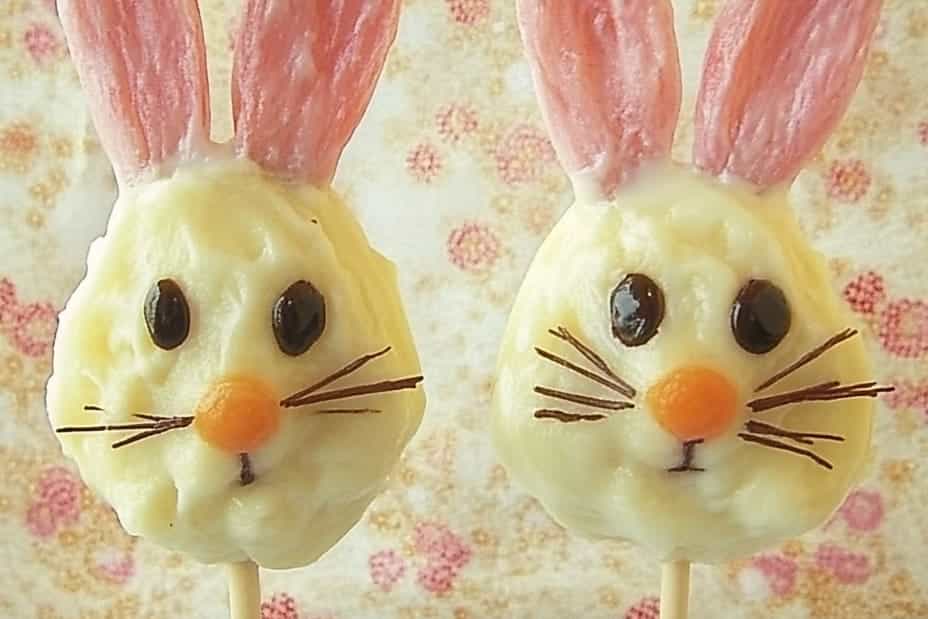
Easter Bunny Yogurt Pops are a deliciously fun treat for spring that will bring joy to both kids and adults alike. As the seasons change and flowers bloom, these vibrant and playful popsicles celebrate the spirit of Easter in a delectable way. Made with creamy yogurt and fruit, they create a wholesome dessert or snack that is both refreshing and satisfying. Imagine biting into a frozen, fruit-flavored delight that is full of health benefits while also being a fun treat. These yogurt pops are shaped like adorable bunnies, adding a whimsical touch to your spring gatherings.
Not only are Easter Bunny Yogurt Pops incredibly tasty, but they also provide an opportunity to spend quality time with family. Creating these pops is a delightful activity, especially for little ones who will enjoy helping to mix, pour, and decorate. The vibrant colors and fun shapes are sure to make outdoor gatherings, Easter parties, or just sunny afternoons more entertaining. Additionally, these pops can be a healthier alternative to traditional sugary treats, making them a guilt-free indulgence that everyone can enjoy.
In this article, we will explore the various aspects that make Easter Bunny Yogurt Pops a must-try recipe this spring. You’ll learn about the preparation time, ingredients needed, step-by-step instructions to make your pops, and creative ideas for serving them that will impress your friends and family. So grab your ingredients, and let’s hop into this delightful recipe!
Why You’ll Love This Recipe
Easter Bunny Yogurt Pops bring a delightful combination of healthiness and fun. Here are some reasons why you and your loved ones will adore this recipe:
1. Healthy Ingredients: Made primarily of yogurt and fresh fruits, these pops are loaded with nutrients while remaining low in added sugars.
2. Unique Presentation: The bunny shape makes these pops visually appealing, perfect for festive gatherings and holiday celebrations.
3. Customizable Flavors: Swap in your favorite yogurt and fruits for endless flavor possibilities, accommodating every palate.
4. Kid-Friendly: Little hands can help in the preparation, making these pops an excellent activity for family bonding.
5. Quick Preparation: The combination of simple steps makes these yogurt pops easy to create in a short amount of time.
6. Refreshing Treat: As the weather warms, these icy delights offer a cool and satisfying option for hot days.
With such an amazing blend of healthiness and fun, you’ll soon realize why Easter Bunny Yogurt Pops are a favorite treat for spring festivities.
Preparation and Cooking Time
Preparing Easter Bunny Yogurt Pops is a breeze! Here’s a quick breakdown of the time involved:
– Preparation Time: 15 minutes
– Freezing Time: 4-6 hours (or overnight)
– Total Time: Approximately 4 hours and 15 minutes
These timings can vary slightly depending on how quickly you work in the kitchen, but this estimate will set you up for a successful outcome.
Ingredients
– 2 cups Greek yogurt (plain or flavored)
– 1 cup mixed fruits (e.g., strawberries, blueberries, bananas)
– 2 tablespoons honey or maple syrup (optional, adjust for sweetness)
– 1 teaspoon vanilla extract
– Bunny-shaped silicone molds or popsicle molds
– Popsicle sticks
– Optional toppings: mini chocolate chips, crushed nuts, or sprinkles
Step-by-Step Instructions

Making Easter Bunny Yogurt Pops is a straightforward process. Just follow these easy steps to create these delightful treats:
1. Prepare the Fruits: Wash, peel, and chop your mixed fruits into small, bite-sized pieces.
2. Mix Yogurt Base: In a mixing bowl, combine the Greek yogurt, honey (if using), and vanilla extract. Stir until well combined and smooth.
3. Layer Ingredients: In each bunny-shaped mold, add a layer of yogurt mixture, followed by a layer of chopped fruits. Repeat until each mold is filled.
4. Insert Sticks: Gently insert popsicle sticks into the molds, ensuring they stand up straight.
5. Freeze: Place the filled molds in the freezer for at least 4-6 hours, or until completely frozen.
6. Remove from Molds: Once frozen, carefully remove the yogurt pops from the molds by gently twisting or running warm water over the outside of the mold.
7. Add Toppings: If desired, add mini chocolate chips or crushed nuts on top for an extra crunch.
8. Serve: Place your Easter Bunny Yogurt Pops on a serving plate and enjoy!
Following these steps will guarantee that your Easter Bunny Yogurt Pops turn out perfectly delicious and adorable!
How to Serve
Serving Easter Bunny Yogurt Pops can enhance the fun factor. Here are some creative ideas that will leave a lasting impression:
1. Presentation: Arrange the pops on a decorative plate or cake stand for a fun display. Consider garnishing with fresh fruits or edible flowers around the base.
2. Themed Setup: Create an Easter-themed dessert table that includes other treats like fruit platters, cupcakes, or decorated cookies. It sets the mood for an enjoyable gathering.
3. Individual Servings: Serve each pop in a small cup for easy handling, especially for younger children.
4. Pairing Options: Accompany your yogurt pops with a light spring beverage, such as lemonade, iced tea, or flavored water to complement their freshness.
5. Fun Dipping Station: Set up a dipping station with toppings like melted chocolate, chopped nuts, and sprinkles for guests to customize their pops.
By adding a personal touch to your presentation, you’ll make the experience of enjoying Easter Bunny Yogurt Pops even more memorable.
In conclusion, Easter Bunny Yogurt Pops are an incredible way to celebrate spring and Easter while indulging in a healthy treat. The process is simple and fun, making them suitable for all ages. Get ready to share the joy of these delightful pops with family and friends, and hop into the spirit of the season this year!
Additional Tips
– Experiment with Fruit Combinations: Don’t hesitate to mix and match different fruits for unique flavors. Consider using peaches, mangoes, or kiwi for a tropical twist.
– Make It a Fun Activity: Involve your kids in the assembly process. Let them choose their favorite fruits or toppings, making it a delightful family bonding experience.
– Add Herbal Touch: Consider adding fresh mint leaves or basil for a refreshing flavor contrast that will elevate your yogurt pops.
Recipe Variation
Feel free to get creative! Here are some fun variations for your Easter Bunny Yogurt Pops:
1. Layered Pops: Create colorful layers by alternating different flavored yogurt and fruits. This can create a visually stunning treat.
2. Dairy-Free Option: Use coconut yogurt or almond yogurt for a dairy-free version. This is great for those with lactose intolerance or dietary restrictions.
3. Chocolate Lovers: Add cocoa powder to the yogurt base or drizzle melted dark chocolate on top for an indulgent chocolate version.
Freezing and Storage
– Storage: Keep the yogurt pops in an airtight container in the freezer for up to 2 months. This will maintain their texture and flavor.
– Thawing: When ready to enjoy, simply remove the desired number of pops from the freezer and let them sit at room temperature for a few minutes to soften slightly before serving.
Special Equipment
While making Easter Bunny Yogurt Pops is simple, a few tools will help achieve the best results:
– Bunny-shaped silicone molds or traditional popsicle molds
– Mixing bowls for blending the yogurt and fruit
– Measuring cups and spoons for accurate ingredient portions
– A blender, if you prefer a smooth yogurt mix or to create a fruit puree
– Popsicle sticks to insert into the molds
Frequently Asked Questions
Can I use frozen fruits instead of fresh?
Yes, frozen fruits work fine! Just ensure they are thawed and drained before mixing to avoid excess liquid.
How do I make yogurt pops without molds?
You can use small cups or ice cube trays as an alternative. Simply fill them with the yogurt mixture and insert a stick once slightly frozen.
Can I sweeten my yogurt pops without using honey or syrup?
Absolutely! Mash ripe bananas or use pureed fruits to naturally sweeten your pops without added sugars.
What if I can’t find bunny molds?
No worries! Any popsicle mold will work perfectly. You can simply create a fun spring-themed label for your pops.
Are there any allergy concerns with this recipe?
While the base ingredients are generally safe, always consider food allergies related to specific fruits or dairy products used.
Conclusion
Easter Bunny Yogurt Pops not only create a delightful and refreshing treat but also encourage creativity and bonding during preparation. Whether for a festive gathering or simply to enjoy on a sunny afternoon, these pops bring joy and health together. With endless variations and possibilities, you’re sure to brighten your spring celebrations with these charming and delicious treats.

Easter Bunny Yogurt Pops: An Incredible Fun Treat for Spring
- Total Time: 0 hours
Ingredients
– 2 cups Greek yogurt (plain or flavored)
– 1 cup mixed fruits (e.g., strawberries, blueberries, bananas)
– 2 tablespoons honey or maple syrup (optional, adjust for sweetness)
– 1 teaspoon vanilla extract
– Bunny-shaped silicone molds or popsicle molds
– Popsicle sticks
– Optional toppings: mini chocolate chips, crushed nuts, or sprinkles
Instructions
Making Easter Bunny Yogurt Pops is a straightforward process. Just follow these easy steps to create these delightful treats:
1. Prepare the Fruits: Wash, peel, and chop your mixed fruits into small, bite-sized pieces.
2. Mix Yogurt Base: In a mixing bowl, combine the Greek yogurt, honey (if using), and vanilla extract. Stir until well combined and smooth.
3. Layer Ingredients: In each bunny-shaped mold, add a layer of yogurt mixture, followed by a layer of chopped fruits. Repeat until each mold is filled.
4. Insert Sticks: Gently insert popsicle sticks into the molds, ensuring they stand up straight.
5. Freeze: Place the filled molds in the freezer for at least 4-6 hours, or until completely frozen.
6. Remove from Molds: Once frozen, carefully remove the yogurt pops from the molds by gently twisting or running warm water over the outside of the mold.
7. Add Toppings: If desired, add mini chocolate chips or crushed nuts on top for an extra crunch.
8. Serve: Place your Easter Bunny Yogurt Pops on a serving plate and enjoy!
Following these steps will guarantee that your Easter Bunny Yogurt Pops turn out perfectly delicious and adorable!
- Prep Time: 15 minutes
- Cook Time: N/A
Nutrition
- Serving Size: 6 pops
- Calories: Approximately 100 kcal per pop
- Fat: 3g
- Protein: 4g