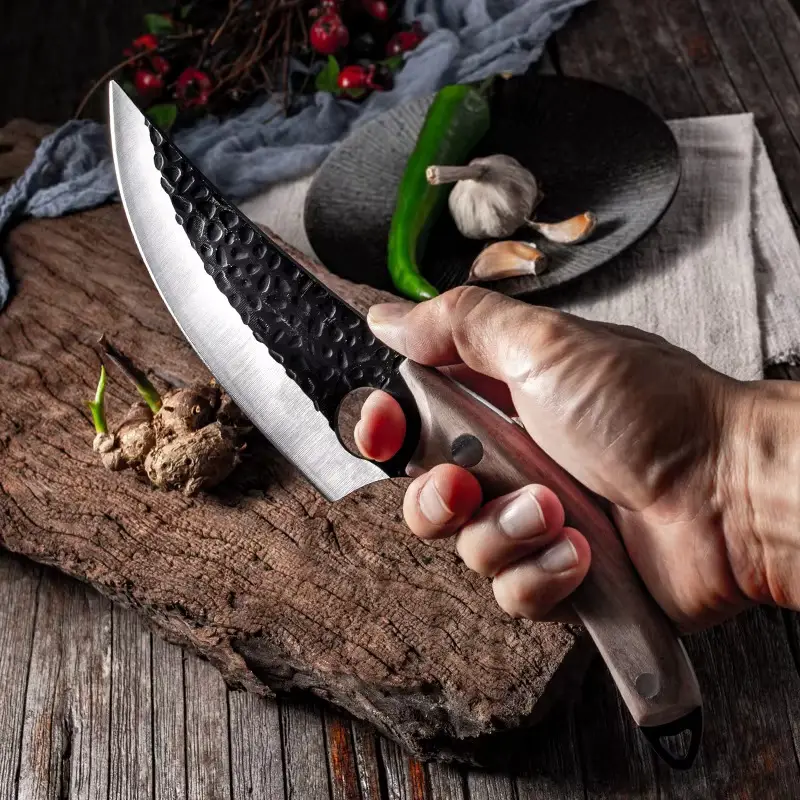
Discover the Kitchen Tool Everyone Is Raving About!
- • Precision Engineered: Sharp blade with durable craftsmanship.
- • Comfort First: Ergonomic design for effortless slicing.
- • Stylish & Strong: Elegant wood handle meets stainless steel strength.
- • Risk-Free Pick: Thousands of happy home chefs can’t be wrong.
- • Today’s Deal: Just $29.95 instead of $99.85 — limited-time offer!
This post may include affiliate links — learn more here .
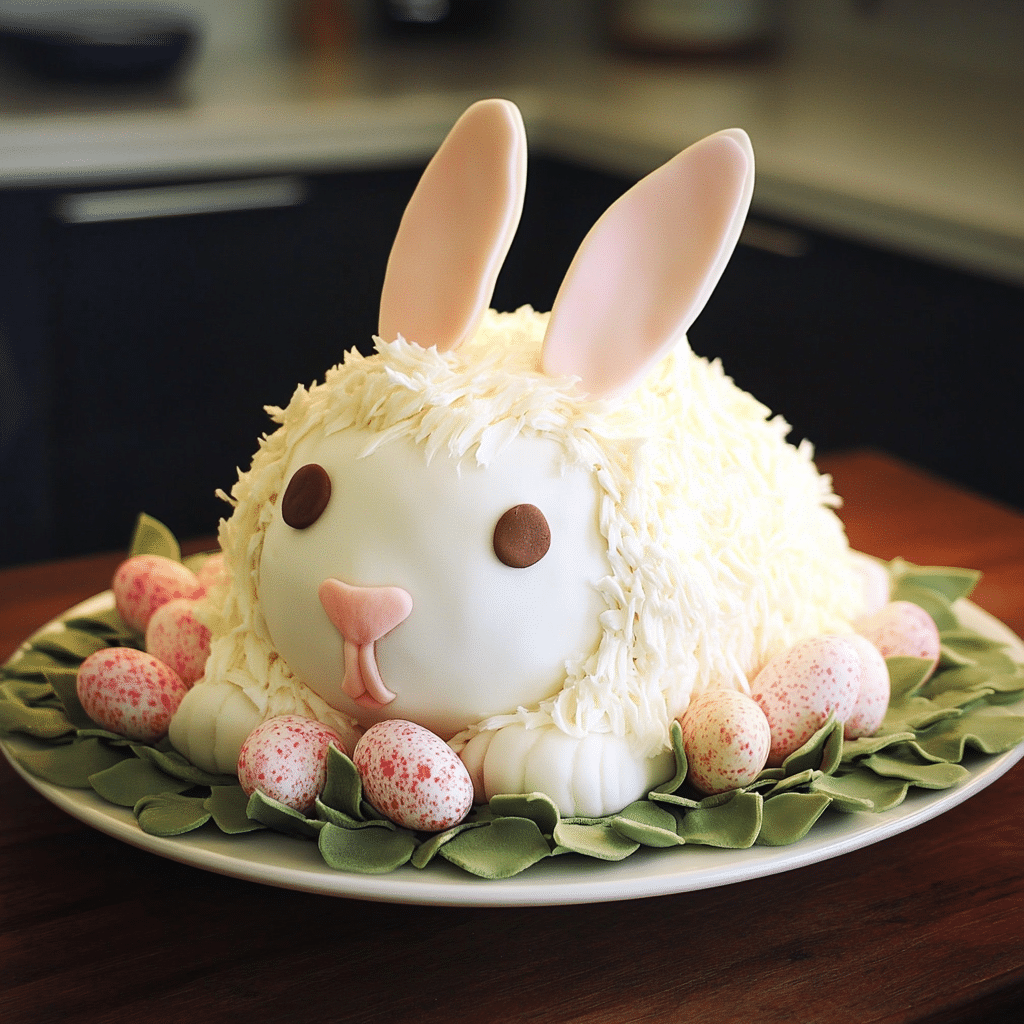
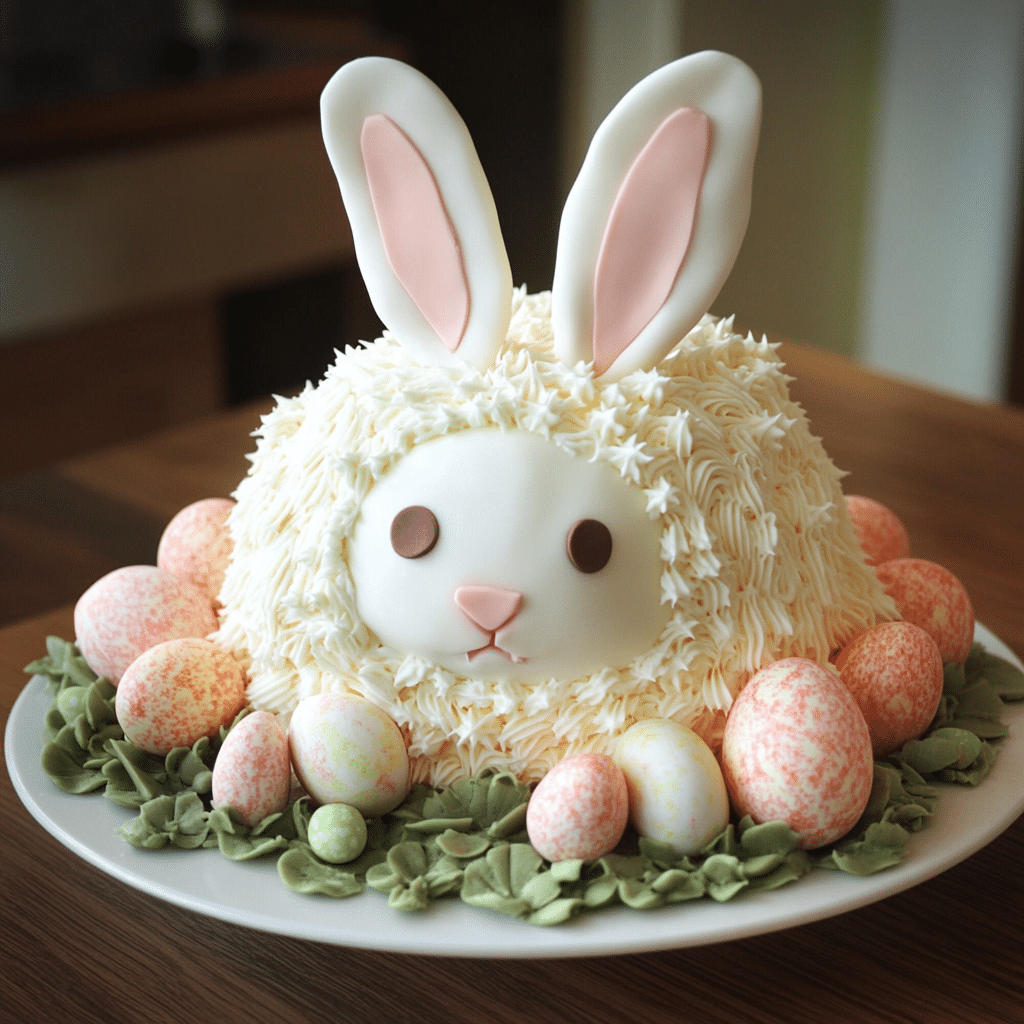
Easter Bunny Cake is an adorable and festive dessert that brings a touch of whimsy to any spring celebration. Made with soft, fluffy cake layers and decorated with sweet frosting, coconut flakes, or pastel-colored candies, this charming bunny-shaped treat is as delightful to look at as it is to eat!
I first made this cake for an Easter brunch, and it instantly became the centerpiece of the table. The excitement of cutting into the fluffy, moist cake and seeing the joy on everyone’s faces made the effort completely worth it. Decorating it was just as fun—using marshmallows for the tail, licorice for whiskers, and candy for the eyes added the perfect finishing touch.
What’s great about this Easter Bunny Cake is how simple yet creative it is. Whether you use a classic vanilla or chocolate base or get adventurous with flavors like carrot or lemon, this cake is sure to be a hit. Perfect for family gatherings, kids’ parties, or just celebrating the joy of spring, this dessert is a must-have for your Easter festivities!
Perfect for:
- Easter celebrations
- Springtime gatherings
- Family-friendly baking
- Kids’ parties
- Coconut and vanilla lovers
Why You’ll Love This Recipe
Here are 10 reasons why this Easter Bunny Cake will become a holiday favorite:
- Adorable Easter Theme: A festive bunny design makes this cake a perfect Easter centerpiece.
- Soft and Moist Cake Base: The vanilla cake is light, fluffy, and full of delicious flavor.
- Coconut Lovers’ Dream: A creamy coconut frosting and shredded coconut topping add a tropical touch.
- Kid-Friendly Fun: A great recipe for getting kids involved in decorating.
- Customizable Decorations: Use colorful candies, chocolate eggs, or edible flowers to personalize the look.
- Perfect for Gatherings: A show-stopping dessert that will impress family and guests.
- Easy to Make: Simple ingredients and step-by-step instructions make this a stress-free bake.
- Make-Ahead Option: Bake the cake in advance and assemble it when ready to serve.
- Versatile Flavors: Swap vanilla for chocolate or add a hint of almond for a unique twist.
- Whimsical and Fun: This cake brings a touch of magic to any Easter table.
Preparation and Cooking Time
- Total Time: 2.5 hours (including cooling and decorating)
- Preparation Time: 45 minutes
- Cooking Time: 30-35 minutes
- Cooling Time: 1 hour
- Servings: 12 servings
- Calories per serving: Approximately 450-500 calories
- Key Nutrients: Protein: 5g, Carbs: 60g, Fat: 22g
Ingredients
For the Vanilla Cake Base:
- 2 ½ cups all-purpose flour
- 2 ½ teaspoons baking powder
- ½ teaspoon salt
- 1 cup unsalted butter, softened
- 1 ¾ cups granulated sugar
- 4 large eggs
- 1 tablespoon vanilla extract
- 1 cup whole milk
the Coconut Frosting:
- 1 cup unsalted butter, softened
- 4 cups powdered sugar
- ¼ cup heavy cream
- 1 teaspoon vanilla extract
- ½ teaspoon coconut extract
- 2 cups shredded sweetened coconut
For Decorating:
- 1 cup shredded coconut (for the bunny fur)
- Pink sanding sugar (for ears and nose)
- Chocolate chips or candy eyes
- Pink jellybean or marshmallow (for the nose)
- Licorice strings or pretzel sticks (for whiskers)
Ingredient Highlights
- Unsalted Butter: Creates a rich and tender cake texture.
- Vanilla Extract: Enhances the flavor with warm, sweet notes.
- Shredded Coconut: Adds texture and a tropical twist to the frosting and decoration.
- Pink Jellybeans and Chocolate Chips: Perfect for creating bunny facial features.
Step-by-Step Instructions


Make the Vanilla Cake Base:
- Preheat Oven: Preheat your oven to 350°F (175°C). Grease and flour two 9-inch round cake pans.
- Mix Dry Ingredients: In a medium bowl, whisk together flour, baking powder, and salt.
- Cream Butter and Sugar: In a large bowl, beat the butter and sugar with an electric mixer until light and fluffy.
- Add Eggs and Vanilla: Beat in eggs one at a time, then mix in vanilla extract.
- Combine Wet and Dry: Alternately add the dry ingredients and milk, beginning and ending with the dry ingredients. Mix until just combined.
- Bake: Divide the batter between the prepared pans and bake for 30-35 minutes, or until a toothpick inserted in the center comes out clean. Let the cakes cool completely.
Prepare the Coconut Frosting:
- Beat Butter: In a large bowl, beat butter until smooth and creamy.
- Add Sugar and Flavoring: Gradually add powdered sugar, heavy cream, vanilla extract, and coconut extract. Beat until light and fluffy.
- Fold in Shredded Coconut: Mix in shredded coconut for texture.
Assemble and Decorate the Cake:
- Cut the Bunny Shape: Place one cake round on a serving tray. Cut the second cake into two crescent-shaped ears and a bow tie shape. Position the ears and bow tie around the round cake to form the bunny shape.
- Frost the Cake: Spread an even layer of coconut frosting over the entire cake.
- Add Bunny Fur: Sprinkle shredded coconut all over the cake to resemble fluffy fur.
- Decorate the Face: Use chocolate chips or candy eyes for the eyes, a pink jellybean for the nose, and licorice strings for the whiskers. Use pink sanding sugar for the inner ears.
- Final Touches: Add additional decorations like pastel candies or edible flowers if desired.
Serve:
- Slice and Enjoy: Serve at room temperature and enjoy the festive flavors!
How to Serve
Here are 10 fun ways to serve Easter Bunny Cake:
- As an Easter Brunch Centerpiece: A stunning dessert for your holiday table.
- With Fresh Berries: Serve with strawberries and blueberries for a fresh contrast.
- With Whipped Cream: A dollop of whipped cream adds extra indulgence.
- With Chocolate Sauce: Drizzle melted chocolate for a richer flavor.
- As a Fun Baking Project: Let kids help decorate their own bunny cakes.
- With Easter Candy: Surround the cake with mini chocolate eggs for a festive touch.
- For a Spring Picnic: A light and fluffy cake perfect for outdoor gatherings.
- With a Cup of Tea: Enjoy with a warm cup of tea or coffee.
- For a DIY Cake Decorating Contest: Let guests decorate their own mini bunny cakes.
- As an Easter Gift: Wrap slices in festive packaging for a sweet holiday treat.
Additional Tips
- Chill the Cake Before Frosting: A cool cake is easier to frost without crumbs.
- Use a Sharp Knife for Cutting Shapes: A serrated knife helps cut clean edges for the bunny design.
- Add a Coconut Flavor Boost: Brush cake layers with coconut milk for extra moisture.
- Make a Chocolate Bunny Cake: Swap the vanilla cake for a chocolate version.
- Use Marshmallow for Fur: If you prefer, mini marshmallows can create a fluffy bunny effect.
Recipe Variations
- Chocolate Coconut Bunny Cake: Use chocolate cake with coconut frosting for a rich variation.
- Lemon Bunny Cake: Add lemon zest and juice for a fresh citrus flavor.
- Carrot Bunny Cake: Swap vanilla cake for a spiced carrot cake version.
- Gluten-Free Option: Use a gluten-free flour blend for the cake.
- Vegan Bunny Cake: Use plant-based milk, butter, and egg substitutes.
- Berry Bunny Cake: Add chopped strawberries or raspberries to the batter.
Special Equipment
- 9-inch Round Cake Pans: For baking the cake layers.
- Electric Mixer: To cream butter and mix frosting.
- Offset Spatula: For smooth frosting application.
- Piping Bag: For decorative frosting details.
- Serrated Knife: For cutting bunny shapes.
FAQ Section
- What is an Easter Bunny Cake?
An Easter Bunny Cake is a festive dessert shaped like a bunny, often decorated with coconut, pastel-colored frosting, and candy to celebrate Easter. - What ingredients do I need to make an Easter Bunny Cake?
You’ll typically need flour, sugar, eggs, butter, baking powder, vanilla extract, and milk for the cake. - How do I shape the cake like a bunny?
Most Easter Bunny Cakes are made using two round cakes—one left whole for the face and the other cut into ears and a bowtie. - Can I use a cake mix instead of making the cake from scratch?
Yes! A boxed cake mix works well if you want a quicker option. - What type of frosting works best?
A buttercream or cream cheese frosting is ideal because it’s thick enough to hold decorations while keeping the cake moist and flavorful. - How do I make the cake look fluffy like a bunny?
Shredded coconut is often sprinkled over the frosting to create a furry texture. You can also use piped frosting for a fur-like effect. - Can I make the cake ahead of time?
Yes! You can bake the cake layers a day in advance and store them in an airtight container. Frosting and decorations should be added closer to serving time for freshness. - What are some fun decorating ideas?
Use marshmallows for bunny cheeks, licorice for whiskers, jelly beans for eyes and nose, and colored coconut or sprinkles for extra festive flair. - Can I make a gluten-free or dairy-free version?
Absolutely! Use gluten-free flour, dairy-free butter, and plant-based milk alternatives to accommodate dietary needs. - How do I store leftovers?
Store any leftover cake in an airtight container at room temperature for up to two days or in the refrigerator for up to five days.
Conclusion
Easter Bunny Cake is an adorable and festive dessert that brings a touch of whimsy to your holiday table. Made with moist cake layers, creamy frosting, and fun decorations, this delightful treat is as much fun to make as it is to eat! Shaped like a bunny with fluffy coconut “fur” or pastel-colored frosting, it’s the perfect centerpiece for your Easter celebration.
This cake is easy to customize—choose your favorite cake flavor, from classic vanilla to rich chocolate, and decorate with sprinkles, candy, or even piped frosting details. Whether you go for a traditional bunny face or a full-bodied bunny shape, this cake is sure to bring smiles all around.
I can’t wait to see how your Easter Bunny Cake turns out! Be sure to share your photos on Instagram and tag me—I’d love to see your festive creations. And don’t forget to leave a comment letting me know how you personalized this adorable dessert!