Discover the Kitchen Tool Everyone Is Raving About!
- • Precision Engineered: Sharp blade with durable craftsmanship.
- • Comfort First: Ergonomic design for effortless slicing.
- • Stylish & Strong: Elegant wood handle meets stainless steel strength.
- • Risk-Free Pick: Thousands of happy home chefs can’t be wrong.
- • Today’s Deal: Just $29.95 instead of $99.85 — limited-time offer!
This post may include affiliate links — learn more here .
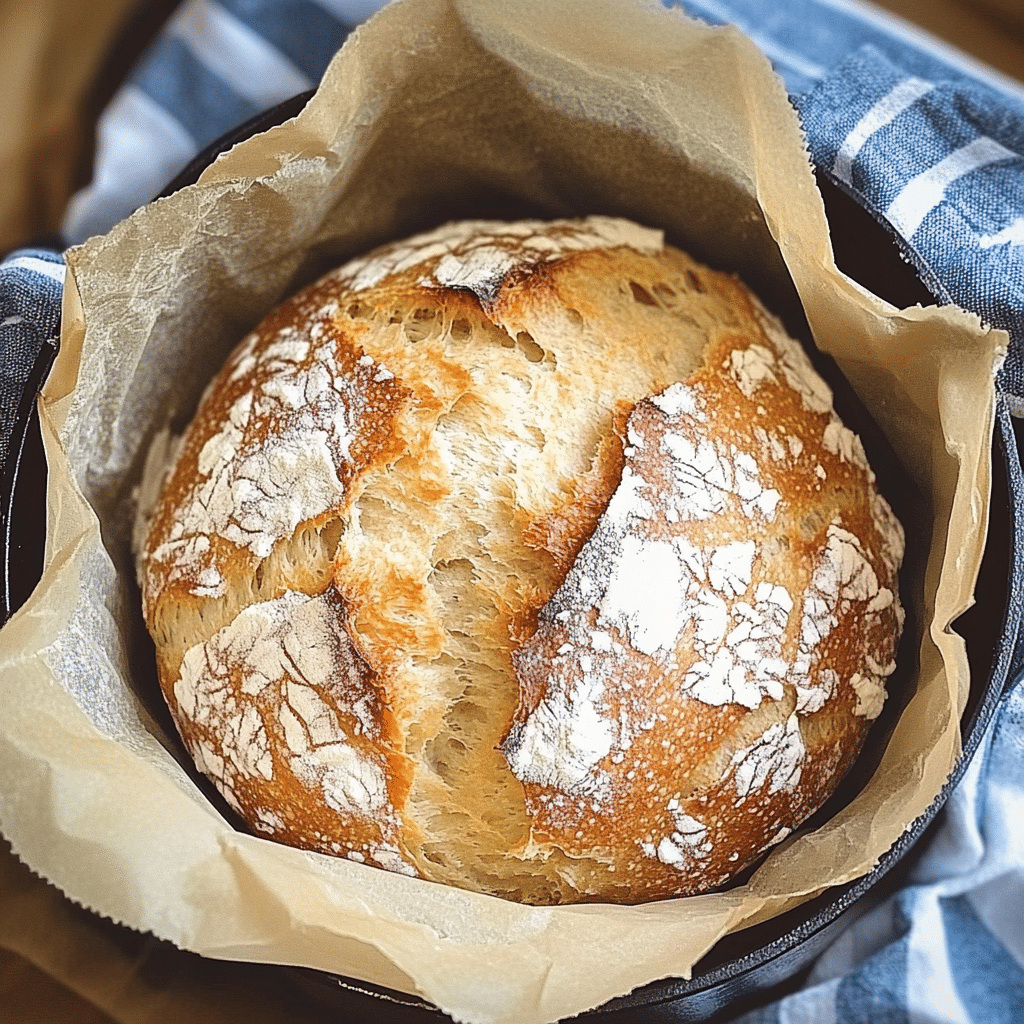
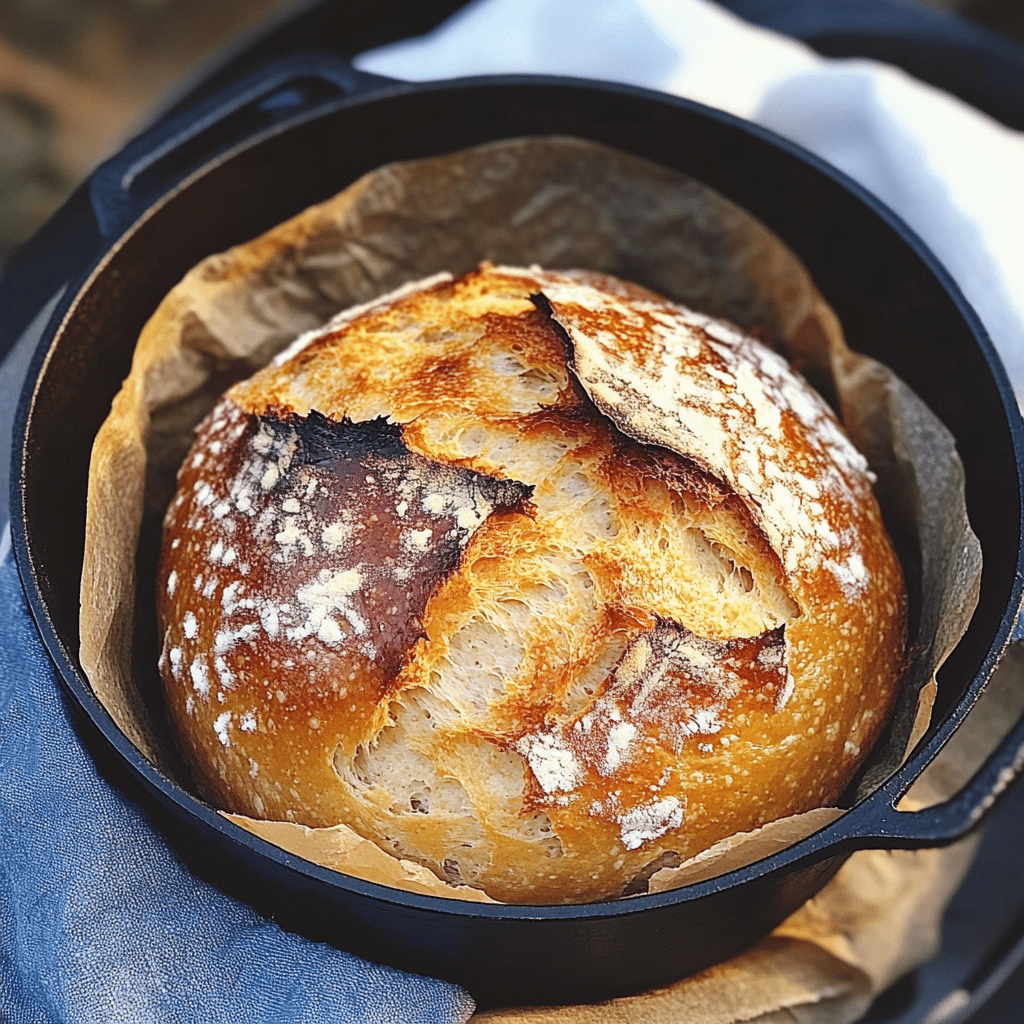
Dutch Oven Bread is the perfect homemade bread that combines a beautifully crisp crust with a soft, fluffy interior. The simplicity of this recipe is what makes it so magical—you only need a few basic ingredients and a bit of patience to create a loaf that rivals any artisan bread from a bakery. The Dutch oven ensures that the bread bakes evenly and creates the perfect steam environment, giving the crust that signature golden, crunchy texture.
The first time I made Dutch Oven Bread, I was amazed at how easy it was to make, yet the results were incredible. The dough came together quickly, and after just a few hours of resting, it was ready to be baked. The heat from the Dutch oven trapped moisture, creating that perfect crust, while the inside stayed light and airy. What I love most about this bread is how versatile it is—you can add herbs, seeds, or even a little cheese to change up the flavor, or just enjoy it as-is with butter for the ultimate comfort food. It’s a foolproof way to bake fresh, homemade bread right in your own kitchen.
Perfect for:
- Family dinners
- Picnics
- Weekend baking projects
- Holiday feasts
- Bread enthusiasts
Why You’ll Love This Recipe
Here are 10 reasons why this Dutch Oven Bread will become your new favorite bread recipe:
- Perfect Crust: The Dutch oven creates a steamy environment, resulting in a beautifully crisp crust.
- Simple Ingredients: Only a handful of ingredients are needed to make this delicious bread.
- No Knead Required: No kneading is necessary, making this recipe quick and easy to prepare.
- Soft and Fluffy Interior: The bread’s inside is light, airy, and tender, with just the right amount of chewiness.
- Rustic Appeal: The round shape and artisan look make this bread visually impressive.
- Versatile: Enjoy it with butter, jam, cheese, or as the perfect accompaniment to soups and stews.
- Make-Ahead Dough: The dough can be prepared in advance and stored in the fridge for up to 24 hours.
- Minimal Effort: You can prep the dough in less than 10 minutes, then let it rise while you do other things.
- Baking with Confidence: The Dutch oven creates a perfectly even heat, ensuring success every time.
- Satisfying Aroma: The smell of freshly baked bread is irresistible and will fill your home with warmth.
Preparation and Cooking Time
- Total Time: 3 hours (including rising time)
- Preparation Time: 10 minutes
- Cooking Time: 45 minutes
- Rising Time: 2 hours
- Servings: 8 servings
- Calories per serving: Approximately 150-200 calories
- Key Nutrients: Protein: 5g, Carbs: 30g, Fat: 1g
Ingredients
For the Bread Dough:
- 3 cups all-purpose flour
- 1 teaspoon salt
- 1 teaspoon active dry yeast
- 1 ½ cups warm water (110°F/43°C)
Ingredient Highlights
- All-Purpose Flour: Provides the structure and texture for a soft, fluffy loaf.
- Active Dry Yeast: Powers the rise of the dough, creating the airy texture.
- Warm Water: Helps activate the yeast for a good rise and soft crumb.
Step-by-Step Instructions


Make the Bread Dough:
- Combine Dry Ingredients: In a large mixing bowl, combine the flour, salt, and yeast.
- Add Water: Gradually pour the warm water into the dry ingredients and stir with a wooden spoon until the dough comes together.
- Mix the Dough: Once the dough has formed, continue stirring for a few more minutes until it becomes slightly sticky.
- Let it Rise: Cover the bowl with a clean kitchen towel or plastic wrap. Allow the dough to rise in a warm spot for 1-2 hours, or until it has doubled in size.
Shape and Bake the Bread:
- Preheat Oven: Preheat your oven to 450°F (230°C) and place a 4-6 quart Dutch oven (with the lid on) inside to heat.
- Shape the Dough: Once the dough has risen, gently punch it down to release the air. Shape it into a round loaf by folding the edges toward the center.
- Prepare to Bake: Carefully remove the hot Dutch oven from the oven and transfer the dough into it. Cover with the lid and return to the oven.
- Bake: Bake the bread for 30 minutes with the lid on, then remove the lid and bake for an additional 15 minutes to allow the crust to brown and crisp up.
- Cool: Once the bread is golden brown and sounds hollow when tapped on the bottom, remove it from the oven. Let the bread cool on a wire rack before slicing.
How to Serve
Here are 10 serving suggestions for Dutch Oven Bread:
- With Butter and Jam: Spread with butter and your favorite fruit jam for a comforting breakfast.
- As Sandwich Bread: Use it to make delicious sandwiches with cold cuts, cheese, and veggies.
- With Soup: Serve alongside a hearty bowl of soup or stew to soak up the flavors.
- With Olive Oil and Balsamic Vinegar: Dip slices into olive oil and balsamic vinegar for an easy appetizer.
- For Bruschetta: Top slices with fresh tomatoes, basil, and a drizzle of balsamic for a delicious bruschetta.
- With Cheese: Pair it with a selection of cheeses for an easy charcuterie board.
- For Toast: Toast slices and top with avocado or a poached egg for a simple breakfast.
- With Garlic Butter: Spread warm bread with garlic butter for an indulgent treat.
- For Crostini: Slice and toast for a crunchy topping for soups, salads, or dips.
- As a Gift: Slice and wrap the bread to give as a homemade gift to friends or family.
Additional Tips
- Use a Dutch Oven with a Tight-Fitting Lid: This helps trap steam, creating the ideal crust.
- Let the Bread Cool Completely: Allow the bread to cool before slicing to avoid a gummy texture.
- Avoid Overmixing the Dough: Stir the dough until just combined, and avoid overworking it to keep the bread light and airy.
- Don’t Skip the Rising Time: Proper rising is key for achieving a light, fluffy loaf.
- Experiment with Add-ins: Add herbs, seeds, or cheese to the dough for extra flavor.
Recipe Variations
- Whole Wheat Bread: Use whole wheat flour for a heartier, more rustic flavor.
- Herb Bread: Add chopped fresh herbs like rosemary or thyme for a savory twist.
- Garlic Bread: Fold in minced garlic and top with garlic butter after baking.
- Cheese Bread: Incorporate shredded cheese like cheddar or Parmesan into the dough.
- Cinnamon Raisin Bread: Add cinnamon and raisins for a sweet breakfast treat.
- Seeded Bread: Sprinkle sunflower, sesame, or poppy seeds on top before baking for a crunchy finish.
- Gluten-Free Bread: Use a gluten-free flour blend for a gluten-free version of this recipe.
- Olive Bread: Add chopped olives to the dough for a Mediterranean-inspired loaf.
Special Equipment
- Dutch Oven: Essential for creating the perfect bread crust.
- Mixing Bowl: For mixing the dough ingredients.
- Wooden Spoon: For stirring the dough.
- Wire Rack: For cooling the bread after baking.
- Lifter or Spatula: To carefully transfer the dough into the hot Dutch oven.
- Kitchen Towel or Plastic Wrap: To cover the dough while it rises.
FAQ Section
- Can I make this bread without a Dutch oven?
Yes, you can bake it on a baking sheet, but you may not get the same crispy crust. - How long does this bread last?
Store the bread in a paper bag at room temperature for up to 3 days. - Can I freeze this bread?
Yes, this bread freezes well. Slice it first, then wrap it tightly in plastic wrap and foil for up to 3 months. - Can I use instant yeast instead of active dry yeast?
Yes, you can substitute instant yeast for active dry yeast in the same amount. - Can I double the recipe?
Yes, you can double the recipe and bake two loaves in separate Dutch ovens. - Why is my bread dense?
Overworking the dough or not allowing it to rise long enough can lead to a dense loaf. - Can I add other ingredients like nuts or dried fruit?
Yes, feel free to add any mix-ins during the dough formation stage. - How can I tell if the bread is fully baked?
Tap the bottom of the loaf; it should sound hollow when done. - What can I use if I don’t have a Dutch oven?
A covered casserole dish or an oven-safe pot with a lid can work as a substitute. - Can I use a bread machine to make this dough?
Yes, you can use a bread machine to mix and rise the dough, then bake it in the Dutch oven.
Conclusion
Dutch Oven Bread is a rustic, hearty loaf that’s beautifully golden on the outside and soft, airy, and chewy on the inside. Baked in a cast-iron Dutch oven, this bread develops a wonderfully crispy crust while maintaining a tender crumb, making it the perfect addition to any meal or enjoyed on its own with a pat of butter. The simplicity of the ingredients—flour, water, yeast, and salt—allows the bread to shine with its deep, satisfying flavor.
The Dutch oven method creates an ideal baking environment by trapping steam, which helps the bread rise and form a beautiful crust. It’s an easy bread to make, even for beginners, and the slow, patient process of rising and baking gives you the time to appreciate the bread-making journey. Whether paired with soups, stews, or just enjoyed fresh out of the oven, this bread is sure to impress.
I can’t wait to see how your Dutch Oven Bread turns out! Be sure to share your photos on Instagram and tag me—I’d love to see your creations. Don’t forget to leave a comment and let me know how you made this bread your own!