
Discover the Kitchen Tool Everyone Is Raving About!
- • Precision Engineered: Sharp blade with durable craftsmanship.
- • Comfort First: Ergonomic design for effortless slicing.
- • Stylish & Strong: Elegant wood handle meets stainless steel strength.
- • Risk-Free Pick: Thousands of happy home chefs can’t be wrong.
- • Today’s Deal: Just $29.95 instead of $99.85 — limited-time offer!
This post may include affiliate links — learn more here .
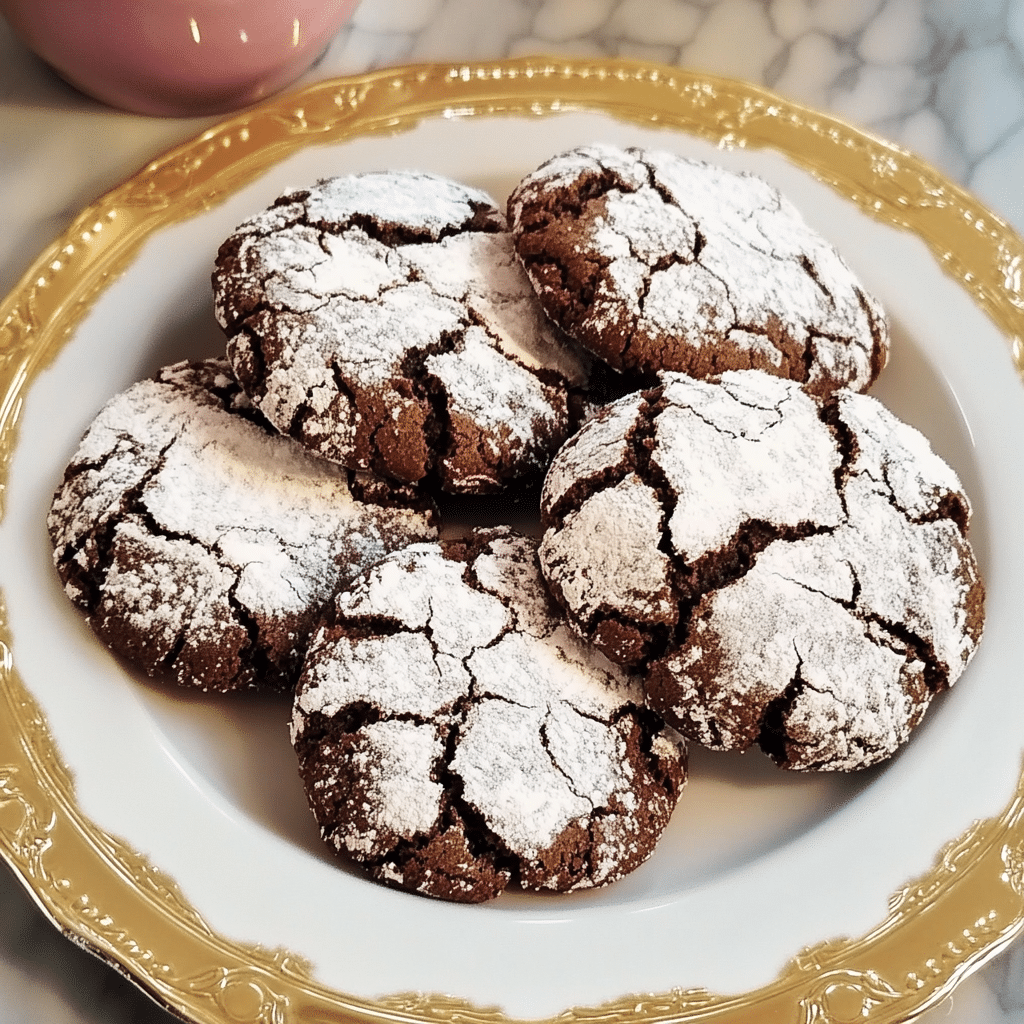
Chocolate Crinkle Cookies are a classic holiday treat that is both rich in flavor and visually striking. These cookies are made with a fudgy, chocolate dough that’s rolled in powdered sugar before baking, which creates their signature crinkled, cracked appearance. When baked, they have a soft, chewy center with a slightly crisp exterior, making each bite an indulgent combination of sweetness and cocoa.
The first time I made Chocolate Crinkle Cookies, I was amazed at how easy it was to achieve that iconic cracked look. The powdered sugar coating gave them a festive, snowy appearance, and the chocolate flavor was rich and comforting. What I love most about these cookies is how versatile they are—you can adjust the amount of cocoa for a deeper chocolate flavor, or add a dash of vanilla or peppermint extract for a different twist. They’re perfect for holiday cookie swaps, a cozy afternoon treat, or whenever you’re craving something chocolatey and delicious!
Perfect for:
- Holiday treats
- Cookie exchanges
- Birthday parties
- Chocolate lovers
- Cozy gatherings
Why You’ll Love This Recipe
Here are 10 reasons why Chocolate Crinkle Cookies will become your go-to cookie recipe:
- Classic Flavor: The deep, rich chocolate flavor is irresistible and perfectly balanced with the powdered sugar coating.
- Chewy and Fudgy Center: The inside of these cookies is soft and chewy, making each bite feel like a decadent indulgence.
- Crispy, Sugary Exterior: The crackly, sugary surface creates a delightful contrast to the soft center.
- Easy to Make: The ingredients are simple and the process is straightforward, making these cookies easy to bake.
- Versatile for Any Occasion: Whether it’s a holiday, party, or cozy evening, these cookies are always a hit.
- Perfect for Gifting: Pack these cookies in a box or jar to give as a homemade gift that will delight anyone.
- Make-Ahead Delight: Dough can be prepared in advance and chilled, making it easy to bake fresh cookies when you need them.
- Customizable Coating: While powdered sugar is the classic choice, feel free to experiment with sprinkles or other coatings.
- No Mixer Required: You can mix the dough by hand, making it a great recipe for all skill levels.
- Kid-Friendly: These cookies are fun to make and share with family and friends, making them perfect for baking with kids.
Preparation and Cooking Time
- Total Time: 2 hours (including chilling time)
- Preparation Time: 20 minutes
- Cooking Time: 10-12 minutes
- Chilling Time: 1-1.5 hours
- Servings: 24 cookies
- Calories per serving: Approximately 120-130 calories
- Key Nutrients: Protein: 2g, Carbs: 18g, Fat: 7g
Ingredients
For the Cookie Dough:
- 1 ½ cups all-purpose flour
- ¼ teaspoon baking powder
- ¼ teaspoon salt
- 4 oz semisweet chocolate, chopped
- ½ cup unsalted butter
- 1 cup granulated sugar
- 2 large eggs
- 1 teaspoon vanilla extract
- ¼ cup unsweetened cocoa powder
For Coating:
- ½ cup powdered sugar
Ingredient Highlights
- Semisweet Chocolate: Rich chocolate provides depth and moisture to the cookie dough.
- Cocoa Powder: Deepens the chocolate flavor and contributes to the signature dark color.
- Powdered Sugar: Coats the cookie dough to create the signature crinkle effect as they bake.
Step-by-Step Instructions


Make the Cookie Dough:
- Melt Chocolate and Butter: In a microwave-safe bowl, melt the semisweet chocolate and butter together in 20-second intervals, stirring in between, until smooth and fully melted.
- Whisk Dry Ingredients: In a separate bowl, whisk together flour, baking powder, and salt.
- Mix Wet Ingredients: In a large bowl, beat granulated sugar, eggs, and vanilla extract until light and fluffy.
- Combine Wet and Dry Ingredients: Stir in the melted chocolate mixture, then gradually add the dry ingredients until the dough comes together.
- Chill Dough: Cover the dough with plastic wrap and refrigerate for 1 to 1.5 hours, or until firm enough to roll into balls.
Form the Cookies:
- Preheat Oven: Preheat your oven to 350°F (175°C). Line a baking sheet with parchment paper.
- Shape Dough into Balls: Scoop tablespoon-sized portions of dough and roll them into balls.
- Coat in Powdered Sugar: Roll each dough ball in powdered sugar, coating it thoroughly.
- Place on Baking Sheet: Arrange the sugar-coated dough balls on the prepared baking sheet, spacing them about 2 inches apart.
Bake the Cookies:
- Bake: Bake for 10-12 minutes, or until the cookies have spread and formed cracks. The centers should still be soft and slightly underbaked.
- Cool: Let the cookies cool on the baking sheet for 5 minutes before transferring them to a wire rack to cool completely.
Serve:
- Enjoy: Serve these cookies at room temperature, or pack them up for sharing with loved ones.
How to Serve
Here are 10 serving suggestions for Chocolate Crinkle Cookies:
- For a Holiday Spread: Serve alongside other holiday cookies for a festive treat.
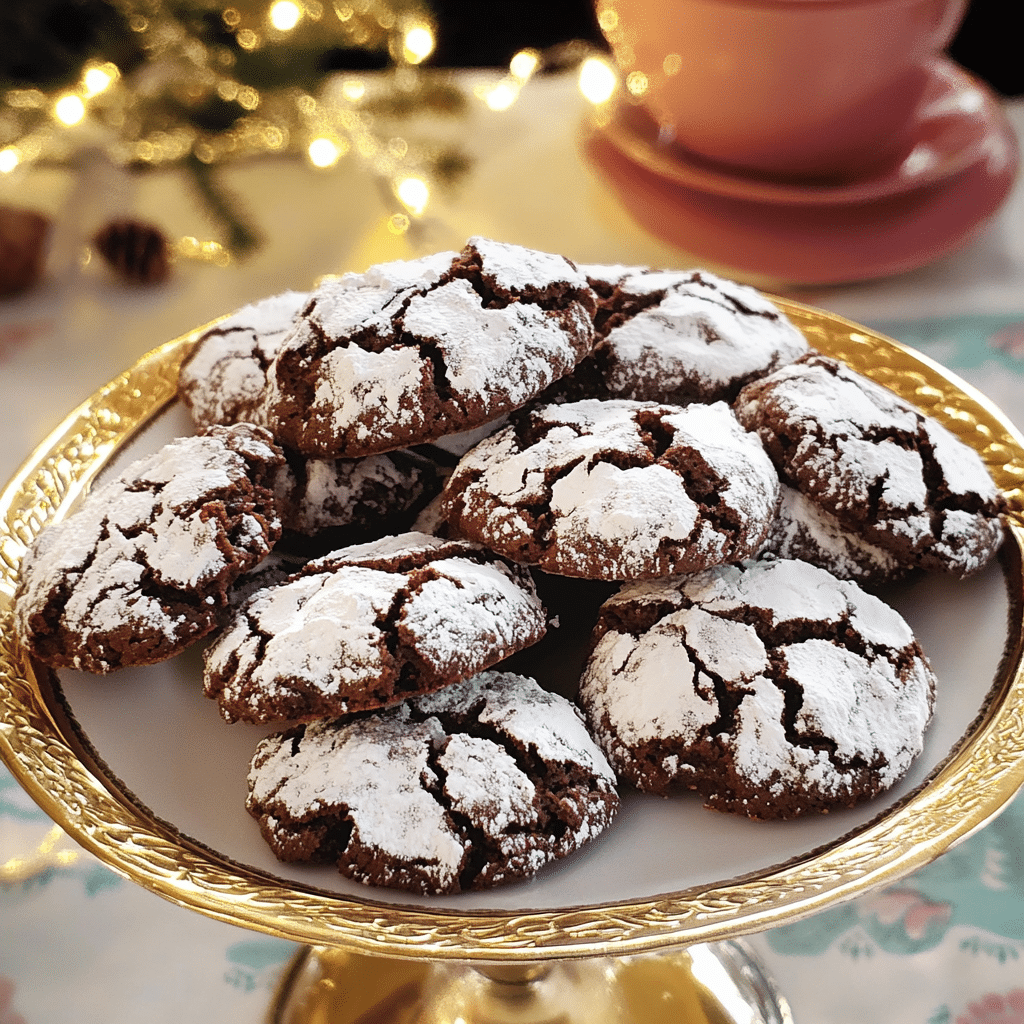
- With a Cup of Hot Cocoa: Perfect for dipping into a warm cup of cocoa or coffee.
- As a Gift: Package these cookies in a jar or box for a homemade gift.
- With Ice Cream: Serve with a scoop of vanilla or chocolate ice cream for an indulgent dessert.
- For a Cookie Exchange: These cookies are a hit at cookie exchanges, adding a classic chocolate touch.
- With Milk: A glass of cold milk pairs perfectly with these fudgy cookies.
- As a Party Snack: Great for parties or gatherings where you want a sweet, easy treat.
- For a Cozy Night In: Perfect to enjoy while watching a movie or reading a book.
- With a Drizzle of Chocolate: Drizzle melted chocolate over the cookies for an extra touch of indulgence.
- As a Treat for Friends: Share with friends during coffee breaks or casual get-togethers.
Additional Tips
- Chill the Dough Well: Make sure to chill the dough long enough so that it’s firm and easy to roll into balls.
- Don’t Overbake: Keep an eye on the cookies, as they will continue to cook on the baking sheet after you remove them from the oven.
- Customize Coating: If you prefer a thicker sugar coating, roll the dough balls in powdered sugar a second time before baking.
- Use High-Quality Chocolate: The flavor of the chocolate will shine through, so use high-quality semisweet chocolate for the best results.
- Avoid Overcrowding the Baking Sheet: Leave enough space between the dough balls to allow for spreading while baking.
Recipe Variations
- Mint Chocolate Crinkle Cookies: Add ½ teaspoon of mint extract to the dough for a refreshing twist.
- White Chocolate Crinkle Cookies: Replace semisweet chocolate with white chocolate for a sweeter, lighter version.
- Nutty Crinkle Cookies: Fold in chopped nuts like walnuts or hazelnuts for a crunchy texture.
- Peanut Butter Crinkle Cookies: Add ¼ cup of peanut butter to the dough for a peanut butter-chocolate variation.
- Dark Chocolate Crinkle Cookies: Use dark chocolate for a more intense chocolate flavor.
- Vegan Crinkle Cookies: Substitute the butter and eggs with plant-based alternatives for a vegan-friendly version.
- Spicy Crinkle Cookies: Add a pinch of cinnamon or chili powder to the dough for a warm, spicy kick.
Special Equipment
- Baking Sheet: For evenly baking the cookies.
- Parchment Paper: To prevent sticking and ensure easy cleanup.
- Cookie Scoop: For evenly portioning the dough into balls.
- Wire Rack: For cooling the cookies after baking.
- Microwave-Safe Bowl: For melting the chocolate and butter.
- Fine Mesh Sieve: For sifting powdered sugar before coating the cookies.
FAQ Section
- Can I freeze the cookie dough?
Yes, you can freeze the dough for up to 3 months. Thaw in the fridge before rolling and baking. - Can I make these cookies gluten-free?
Yes, substitute the all-purpose flour with a gluten-free flour blend. - How long do these cookies last?
Stored in an airtight container, they’ll stay fresh for up to 1 week. - Can I use a different type of sugar for the coating?
Yes, you can use granulated sugar or colored sugar for a different look. - How do I make these cookies crispier?
Bake them a minute or two longer for a crisper texture, but be careful not to overbake. - Can I use dark chocolate instead of semisweet?
Yes, dark chocolate will give the cookies a more intense chocolate flavor. - Can I make these cookies ahead of time?
Yes, they can be baked in advance and stored at room temperature. - How do I store these cookies?
Keep them in an airtight container to maintain their freshness. - Can I add other flavorings to the dough?
Yes, vanilla, almond extract, or even orange zest can add a unique twist to the flavor. - How do I prevent the cookies from spreading too much?
Chill the dough well and avoid greasing the baking sheet to ensure the cookies hold their shape.
Conclusion
Chocolate Crinkle Cookies are a classic holiday treat that are as delicious as they are beautiful. These cookies have a rich, fudgy center with a slightly crisp exterior that’s coated in a generous dusting of powdered sugar, which gives them their signature crinkled look as they bake. The combination of cocoa powder and melted chocolate in the dough results in a deeply chocolatey flavor, and the powdered sugar adds a touch of sweetness and visual appeal.
The process is simple—after mixing the ingredients, you roll the dough into balls, coat them in powdered sugar, and bake. The sugar cracks and creates a beautiful contrast against the dark, moist center. They’re perfect for gifting, sharing at a party, or just enjoying with a cup of milk.
These cookies can be made even more decadent by adding a few chocolate chips or drizzling melted chocolate on top once they’re baked, but they’re just as irresistible in their classic form.
I can’t wait to see how your Chocolate Crinkle Cookies turn out! Be sure to share your photos on Instagram and tag me—I’d love to see your tasty creations. Don’t forget to leave a comment and let me know how you made this dish your own!