Discover the Kitchen Tool Everyone Is Raving About!
- • Precision Engineered: Sharp blade with durable craftsmanship.
- • Comfort First: Ergonomic design for effortless slicing.
- • Stylish & Strong: Elegant wood handle meets stainless steel strength.
- • Risk-Free Pick: Thousands of happy home chefs can’t be wrong.
- • Today’s Deal: Just $29.95 instead of $99.85 — limited-time offer!
This post may include affiliate links — learn more here .
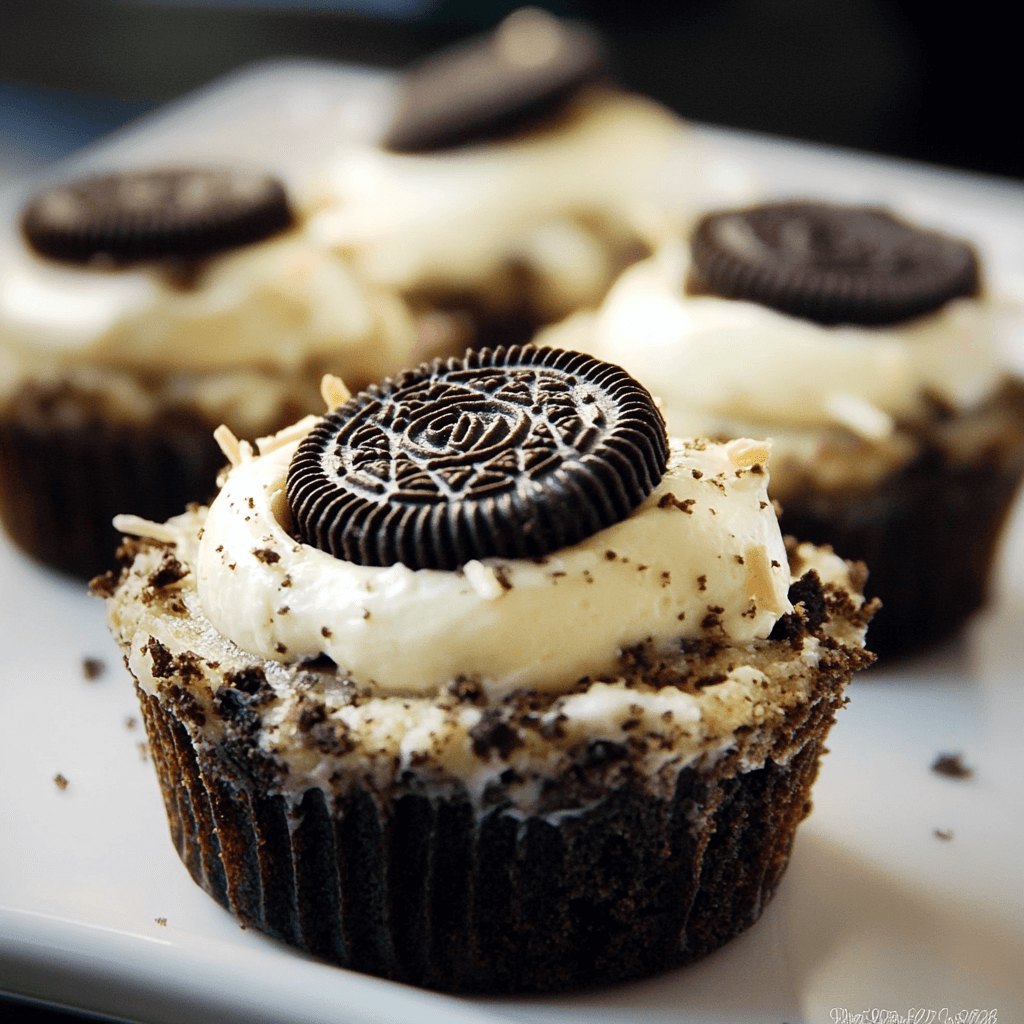
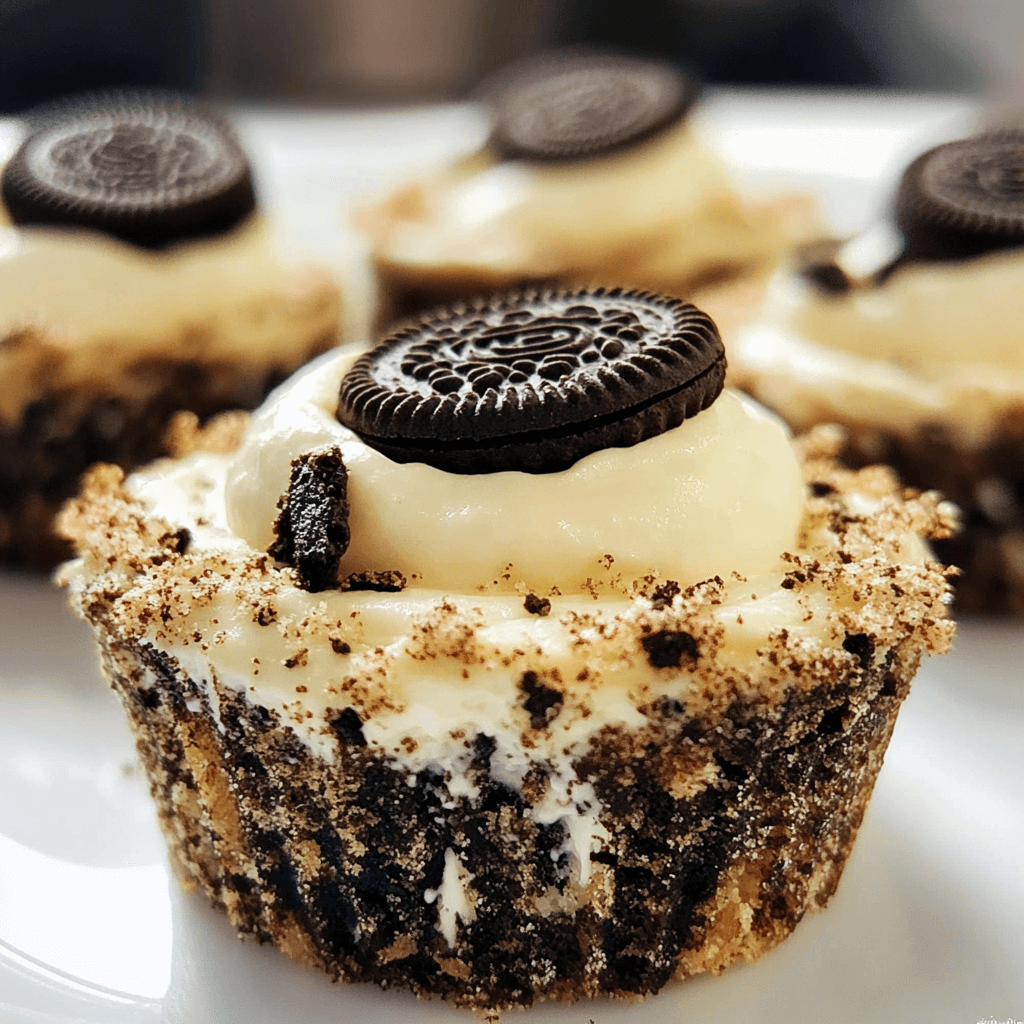
Bird’s Nest Mini Oreo Cheesecakes are the perfect bite-sized dessert for spring, featuring a creamy cheesecake filling on top of an Oreo cookie crust, all decorated to resemble adorable little nests. Topped with chocolate shavings or toasted coconut and colorful candy eggs, these mini treats are as fun to make as they are to eat!
I first made these for an Easter gathering, and they were an instant hit. The smooth, rich cheesecake paired with the crunchy Oreo base was irresistible, and the festive “nest” topping added the perfect seasonal touch. They were easy to make and even easier to disappear from the dessert table!
What’s great about Bird’s Nest Mini Oreo Cheesecakes is that they’re simple yet impressive. You can customize them with different candies, drizzle them with chocolate, or even add a hint of citrus to the filling. Whether for a holiday or just a sweet treat, these mini cheesecakes are sure to bring smiles!
Perfect for:
- Easter celebrations
- Spring gatherings
- Baby showers
- Birthday parties
- Oreo lovers
Why You’ll Love This Recipe
Here are 10 reasons why these Bird’s Nest Mini Oreo Cheesecakes will be your new favorite dessert:
- No-Bake & Easy to Make: Simple steps and no oven required.
- Creamy & Crunchy: The rich cheesecake filling pairs perfectly with the crisp Oreo base.
- Adorable Presentation: These mini cheesecakes look just like tiny bird’s nests!
- Perfect Portion Size: Individual servings make them ideal for sharing.
- Kid-Friendly Fun: A great baking activity for children to help with decorating.
- Make-Ahead Friendly: Can be prepared in advance for convenience.
- Customizable Decorations: Use different candies or chocolates for variety.
- Rich Chocolate Flavor: The Oreo crust and chocolate garnish add an indulgent touch.
- Light & Fluffy Texture: The cheesecake filling is smooth, airy, and delicious.
- No Fancy Equipment Needed: Just basic kitchen tools and a muffin pan!
Preparation and Cooking Time
- Total Time: 4 hours (including chilling time)
- Preparation Time: 30 minutes
- Chilling Time: 3.5 hours
- Servings: 12 mini cheesecakes
- Calories per serving: Approximately 300-350 calories
- Key Nutrients: Protein: 4g, Carbs: 35g, Fat: 18g
Ingredients
For the Oreo Crust:
- 20 Oreo cookies, crushed
- 4 tablespoons unsalted butter, melted
the Cheesecake Filling:
- 8 oz cream cheese, softened
- ½ cup powdered sugar
- 1 teaspoon vanilla extract
- 1 cup heavy whipping cream, whipped
For the Topping:
- 4 oz semisweet chocolate, grated or shaved
- 36 mini candy eggs (such as Cadbury Mini Eggs or M&M eggs)
Ingredient Highlights
- Oreo Cookies: Provide a rich, chocolatey crunch to the base.
- Cream Cheese: The star ingredient for a smooth, creamy cheesecake filling.
- Heavy Whipping Cream: Adds lightness and stability to the cheesecake mixture.
- Chocolate Shavings: Creates the perfect “nest” appearance for decoration.
- Mini Candy Eggs: A colorful and festive touch for the final look.
Step-by-Step Instructions


Prepare the Oreo Crust:
- Crush the Oreos: Place the Oreo cookies in a food processor and pulse until finely ground.
- Mix with Butter: In a bowl, combine the crushed Oreos with melted butter until evenly moistened.
- Press into Muffin Cups: Line a muffin tin with cupcake liners and evenly distribute the crust mixture, pressing down firmly.
- Chill: Place in the refrigerator while preparing the cheesecake filling.
Make the Cheesecake Filling:
- Beat Cream Cheese & Sugar: In a large bowl, beat the softened cream cheese and powdered sugar until smooth and fluffy.
- Add Vanilla: Mix in the vanilla extract until fully incorporated.
- Fold in Whipped Cream: Gently fold in the whipped cream, ensuring a light and airy texture.
Assemble the Cheesecakes:
- Fill the Crusts: Spoon the cheesecake mixture over the chilled crusts, smoothing the tops with a spatula.
- Chill to Set: Refrigerate for at least 3 hours, or until firm.
Decorate the Nests:
- Create the Nest: Sprinkle grated or shaved chocolate over the top of each cheesecake to resemble a nest.
- Add Candy Eggs: Place three mini candy eggs in the center of each cheesecake.
Serve:
- Enjoy: Peel away the liners and serve chilled.
How to Serve
Here are 10 serving suggestions for Bird’s Nest Mini Oreo Cheesecakes:
- As an Easter Treat: A perfect addition to your holiday dessert spread.
- With Whipped Cream: Add a small dollop of whipped cream for extra indulgence.
- On a Dessert Platter: Display with other spring-themed treats.
- With a Drizzle of Chocolate: Enhance with a drizzle of melted chocolate or caramel sauce.
- For a Kids’ Party: Serve as a fun, hands-on decorating activity for children.
- As a Gift: Package in a festive box and gift to friends and family.
- With Fresh Berries: Serve with strawberries or raspberries for a fruity contrast.
- As a Brunch Dessert: A great addition to a springtime brunch spread.
- For Afternoon Tea: Pair with a cup of tea or coffee for a sweet break.
- With Different Toppings: Swap the chocolate shavings for toasted coconut for a tropical twist.
Additional Tips
- Use a Piping Bag: For a smoother, neater cheesecake filling.
- Let Them Fully Set: Chilling for at least 3 hours ensures the perfect texture.
- Experiment with Oreos: Try Golden Oreos or flavored varieties for a unique twist.
- Don’t Overbeat the Cream: Whip just until stiff peaks form to avoid a grainy texture.
- Keep Refrigerated: These cheesecakes should be stored in the fridge until ready to serve.
Recipe Variations
- Chocolate Lover’s Nest – Use a chocolate cheesecake filling and top with mini chocolate eggs for an extra cocoa kick.
- Peanut Butter Delight – Swirl peanut butter into the cheesecake batter and top with peanut butter eggs for a nutty twist.
- Fruity Nest – Add a spoonful of berry compote inside before baking and top with pastel-colored jelly beans.
- Carrot Cake Nest – Use a spiced cheesecake base with hints of cinnamon and nutmeg, then top with white chocolate eggs for a festive flavor.
- Matcha Green Tea Nest – Blend matcha powder into the cheesecake batter and decorate with white chocolate eggs for an earthy touch.
- Lemon Burst Nest – Add lemon zest and juice to the filling for a refreshing citrus twist, paired with speckled candy eggs.
- Cookie Monster Nest – Mix crushed Oreos into the batter and top with mini chocolate chip cookies instead of eggs.
- Coconut Cream Nest – Sprinkle shredded toasted coconut over the cheesecakes and add coconut-flavored chocolate eggs.
- Salted Caramel Nest – Drizzle salted caramel over the cheesecake and use caramel-filled chocolate eggs for a rich indulgence.
- Strawberry Shortcake Nest – Fold in crushed freeze-dried strawberries into the cheesecake batter and top with strawberry-flavored candy eggs.
Special Equipment
- Muffin Tin – To hold and shape the mini cheesecakes.
- Cupcake Liners – For easy removal and serving.
- Food Processor – To crush Oreos into fine crumbs for the crust.
- Hand Mixer or Stand Mixer – To mix the cheesecake batter smoothly.
- Mixing Bowls – For combining ingredients.
- Spatula – For folding ingredients and scraping the sides of bowls.
- Measuring Cups and Spoons – To ensure accurate ingredient portions.
- Piping Bag (Optional) – If decorating with chocolate or frosting.
- Cooling Rack – To allow cheesecakes to cool properly.
- Ziploc Bag (Alternative to Piping Bag) – For drizzling melted chocolate over the nests.
FAQ Section
- Can I make these cheesecakes ahead of time?
Yes! You can prepare them up to 2 days in advance and store them in the refrigerator until ready to serve. - Do I need to bake the Oreo crust?
No, the Oreo crust sets as the cheesecake bakes, so there’s no need for pre-baking. - Can I use a different cookie for the crust?
Absolutely! Graham crackers, chocolate wafers, or digestive biscuits make great alternatives. - What kind of chocolate should I use for the nest topping?
You can use melted milk chocolate, dark chocolate, or even chocolate ganache for the nest effect. - How do I prevent my cheesecakes from cracking?
Make sure not to overmix the batter and bake at a low temperature. Let them cool gradually to avoid sudden temperature changes. - Can I freeze these cheesecakes?
Yes! Freeze them (without toppings) in an airtight container for up to 2 months. Thaw in the fridge before decorating and serving. - What can I use instead of shredded chocolate for the nest?
Toasted coconut, chocolate sprinkles, or thinly piped chocolate lines work well as nest alternatives. - How do I know when the cheesecakes are done baking?
They should be set around the edges but slightly jiggly in the center. They will firm up as they cool. - Can I make these cheesecakes without eggs?
Yes! You can replace the eggs with a combination of Greek yogurt or cornstarch as an egg-free alternative. - 1What’s the best way to store leftovers?
Keep them in an airtight container in the refrigerator for up to 4 days for the best texture and freshness.
Conclusion
Bird’s Nest Mini Oreo Cheesecakes are an adorable and delicious Easter treat that combines rich, creamy cheesecake with a crunchy Oreo crust. Topped with toasted coconut “nests” and candy eggs, these mini cheesecakes are as fun to make as they are to eat!
Perfect for spring gatherings, Easter celebrations, or a festive dessert table, these bite-sized treats can be customized with your favorite chocolate eggs or pastel sprinkles. Serve them chilled for a creamy, dreamy bite of cheesecake goodness!
I can’t wait to see how your Bird’s Nest Mini Oreo Cheesecakes turn out! Be sure to share your photos on Instagram and tag me—I’d love to see your beautiful creations. Don’t forget to leave a comment and let me know how you made this recipe your own!